Today I present my first Delta robot made with Arduino. The Delta robot structure was designed by a professor at the Technical University of Lausanne in 1985. It is a parallel robot, and within two decades has become the star of pick and place industrial robots . The delta robot distinctive elements are two:
- The robot geometry which simplifies the equations of motion (kinematics)
- The great idea to anchor the robot upside down so that it has the motors connected to the base. This is very important because while the robot works, the motors remain attached at the base, allowing the robot to have arms very light. Lightness means low friction, low inertia, low power motors, precision, speed, fast acceleration and deceleration.
These are two examples of delta robot:
These aren’t laboratory prototypes, but commercial robots and they cost about 50-60.000 euros. I tried to build a simple delta robot with Arduino. My Delta robot works like the commercial Delta robot, ie, in inverse kinematics. Given a point x, y, z in space, in real time Arduino calculates the angles of the servomotors that allow to reach that point in space.
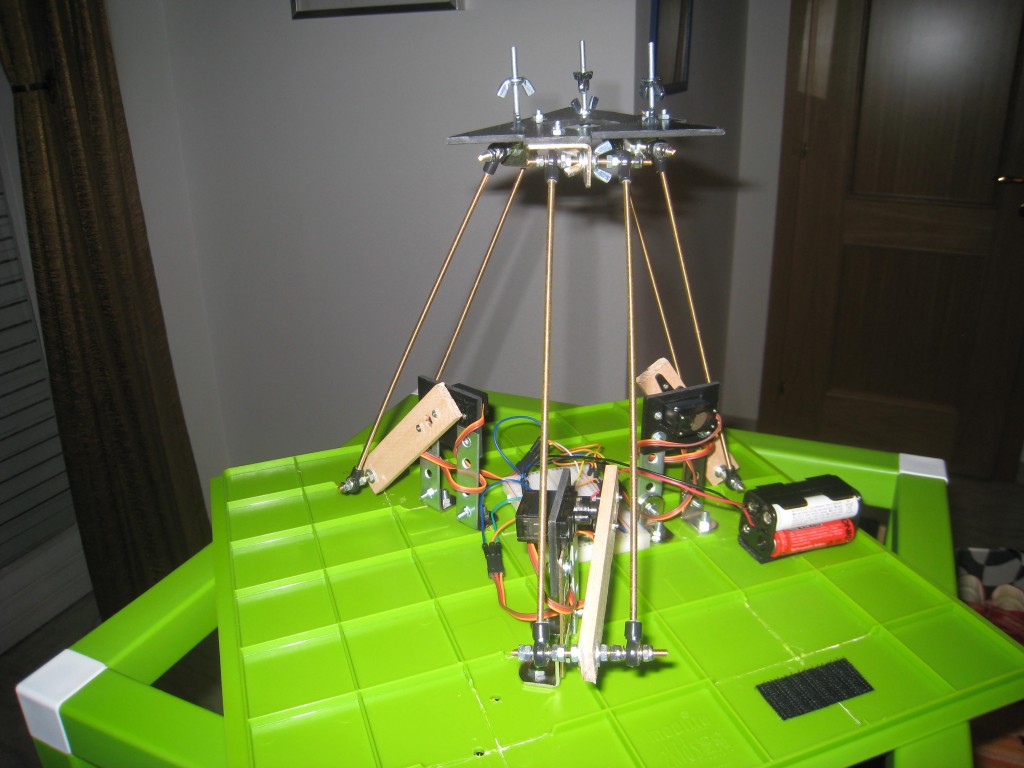
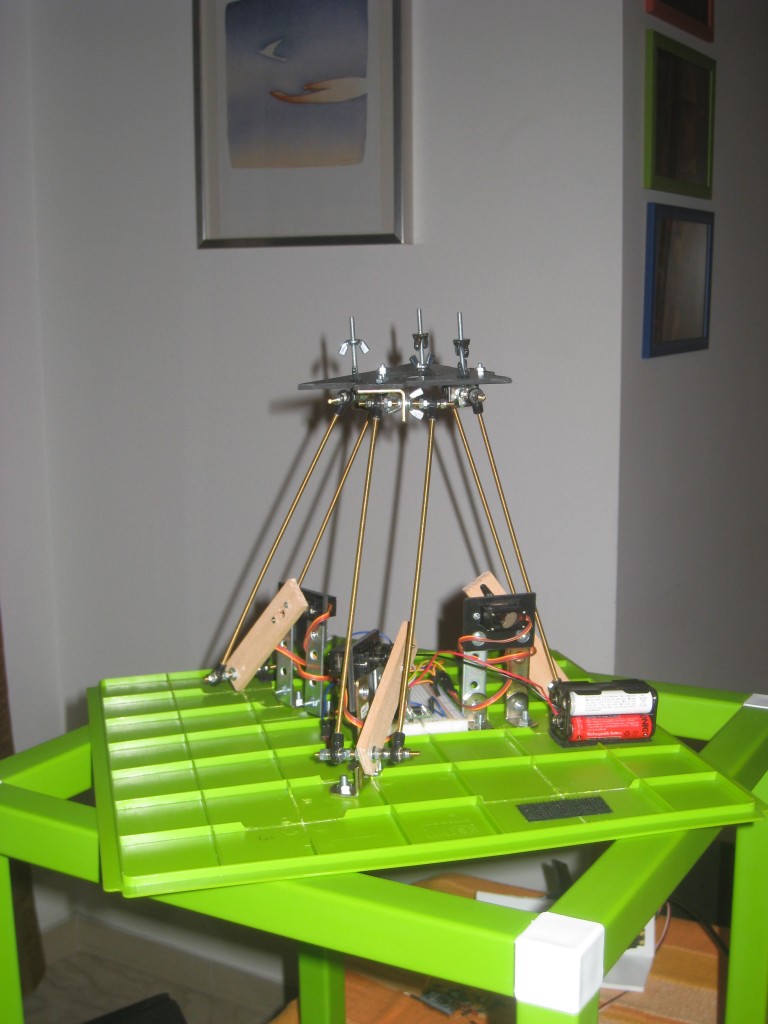
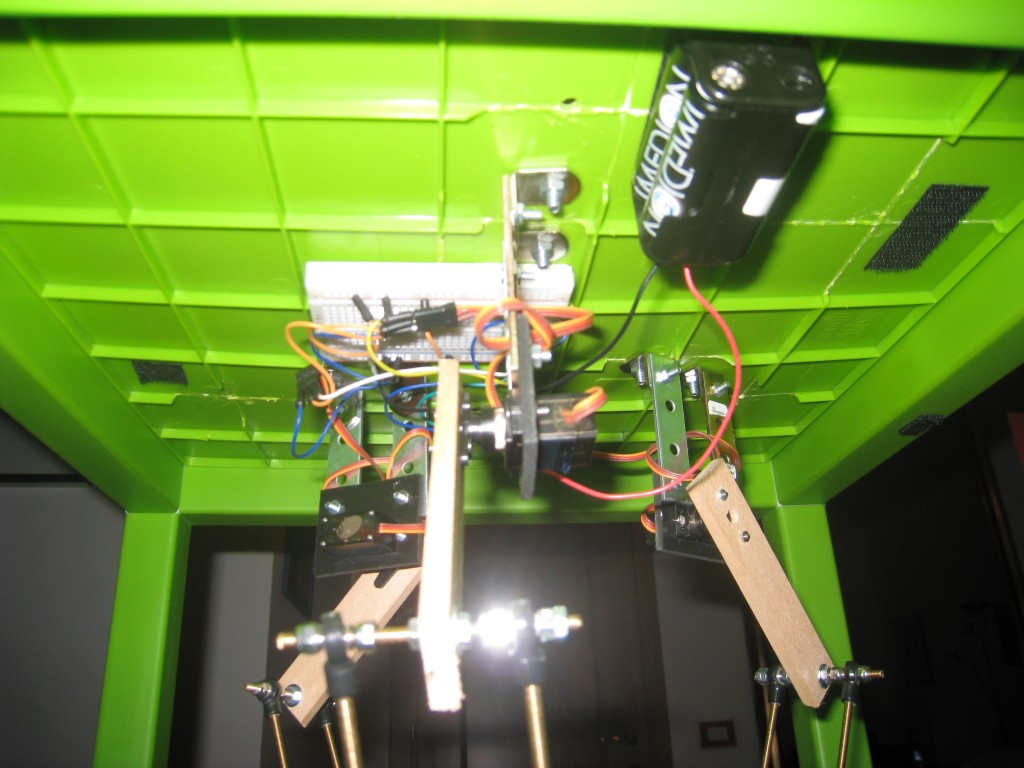
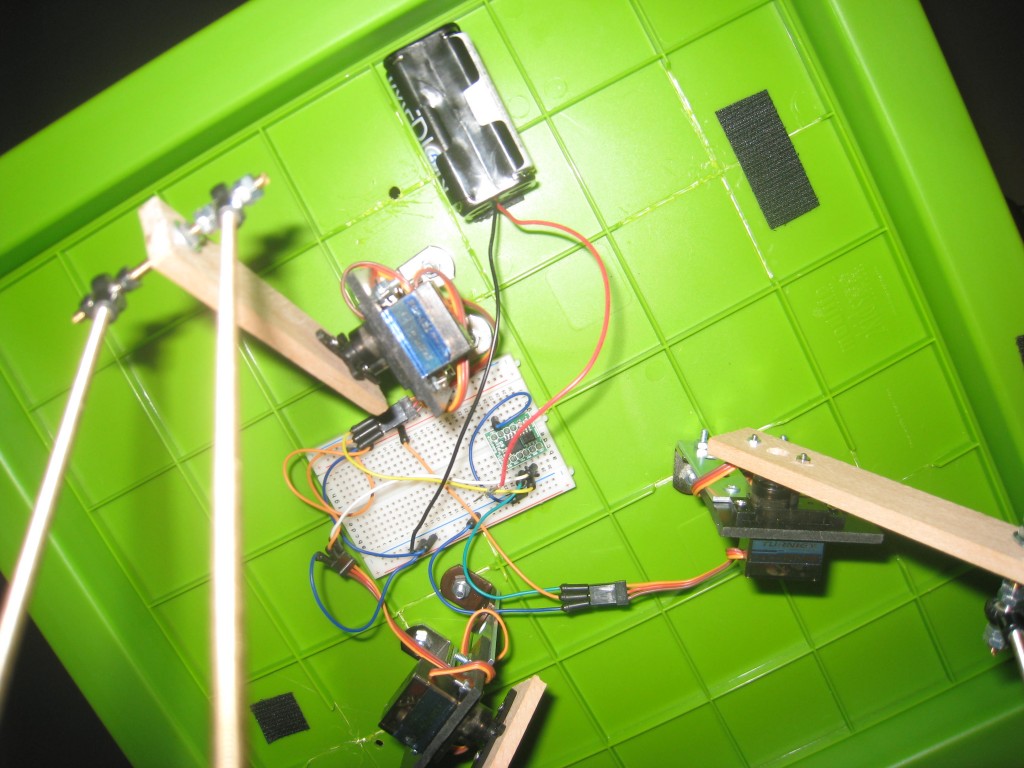
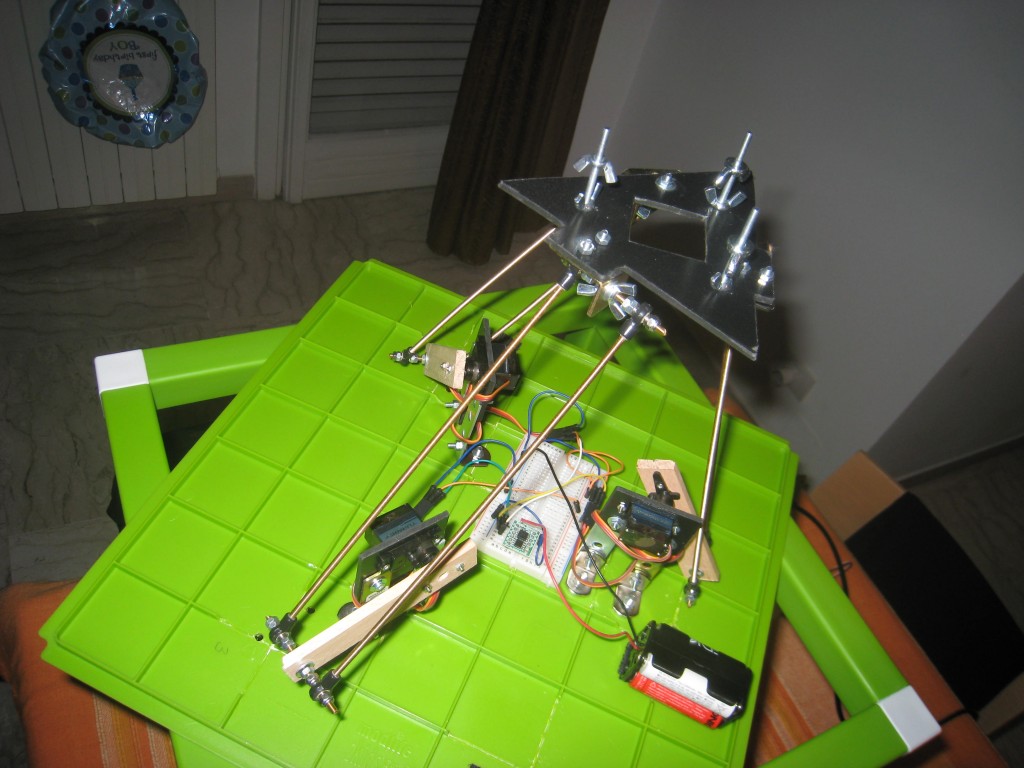
The Delta robot has two triangular plates. A higher which is fixed and the lower is free. The servo motors are fixed to the top plate. The gripping tool (i.e. an electromagnet, a gripper, a vacuum suction cup), is fixed to the lower plate. The two plates are triangular equilateral, that is, equal sides and equal angles of 60 °.
The Delta has 3 servo motors and two arms for each servo. One is integral with the servo. The other arm is free to rotate in all directions and it is connected to the lower small triangle. In order to ensure the free turning, the second arm is linked with ball joints. To find the ball joints has not been easy. I found something about the steering of the machine model. Just search on google “joint Uniball” and you can find little cheap joints.
A very good explanation about the the Delta robot geometry and a very effective explanation of inverse and direct kinematics formulas can be found here . You can find also the code that calculates the inverse kinematic.
These are some Delta robot pictures (with an ATtiny85 microcontroller).
The end effector can be used with different tools. I tried a vacuum syringe and a drawing pen.
These below are some videos with different tools.
The first experiment with a simple trajectory (a circle).
The Delta robot drove by a mouse with Processing. The code is available here.
The Delta robot in pick and place configuration. The code is available here.
The Delta robot drawing. This is a first draft. The code is available here.

Hello. I am a student what also building a delta robot. I want to know if you still have the design with that you can send me to the mail that would help me a lot. (with meters,design, stl or anything that u have)
Thanks very much for the atention. I wait for the answer
email : [email protected]
Skype has opened up its online-based customer beta to the entire world,
right after establishing it largely within the United states and You.K.
previous this 30 days. Skype for Online also now supports Linux and Chromebook
for immediate messaging connection (no voice and video nevertheless, these require a
plug-in installation).
The expansion of the beta adds help for a longer listing of dialects to aid
reinforce that global functionality
Hello
I am working to construct a 2D delta robot with arduino as my bachelor’s project.
I would be so happy if u contact me and let me know how to connect the motors to arduino and also how to program it!!!
thanks a lot
what is the identiyty of the servos which u have configurd
Hi bro, i have a quest, in tha raduino code of Delta Drawing, what i can do to remove the finite mov(pressing rest on arduino starts again), and repeat the secuence infinite times?
Hi bro, i have a quest.
in The Delta robot drove by a mouse with Processing:
You connect the servos direct to arduino, what inputs did you use in the arduinos?
Thanks
I think your other project using 2D steppers and one solenoid for pen up/down is more feasible. it can be done even with a modified CD player mechanism. Do you have a tutorial/code for that one ? did you use OpenCV to turn the photo into sketch ? whetevr your reply, I must admit that your work is ingenous.
It can be used as industrial robots? Examples of this robot http://turkotomasyon.com/projeler/delta-robot.html
Hi, nice project 😀 Do you know where can I buy the unicersal joints?
You can find it in any 3d printer shop (for delta printer) or in any rc hobby shop (i.e. http://www.hobbyking.com). Search for “ball joint” or “ball link”
Hello Robottini,
Could you please explain me why the code is not working for me? i want to control the servos with my mouse. I have uploaded the code in my arduino (mega 2560) and connected the servos to port 3,6 and 9 (like in the code). next i uploaded the code for processing, witch works (i get the triangles). But when i run the code, I get no response from the servos (no movement)… And I have no idea what is wrong :S (i also tried connecting 1 servo first) and the RX LED is blinking…
i also used an external power supply (connected the grounds) for the servos.
Could you please help me?
Thanks in advance 🙂
I don’t know the word to unzip can u tell me. Thank you very much
There are no password
Hola, Can you tell me how to work Delta_drawing program?
thanks”’
hey, it’s really a cool project to learn arduino and robotics. Could you please tell me the rating of the servo like stall torque etc so that I can down size the arm length of the robot.
thank you
hi how can i check if data is comming to arduino?
if i try open serial monitor in arduino i recive a menssege port is bussy
. so i can assume that processing is using the right port “com 6” but the servos dont respond to the mouse
can you help me? 🙂
Hi, the code ” The Delta robot drawing. This is a first draft. The code is available here.” not have the code processing, this only arduino, please I need see this code.
Thanks
If you unzip all the files in the same directory and you open the Pneumo_Arduino.pde, yuo will see all the files as tabs in the IDE.
But Pneumo_Arduino code does not involve servo.pde,kinematics.pde. vs.Should i import this codes into the Pneumo Arduino code?
The code is only 1, divided in 5 files in order to show the different modules of the code. You have to use all of them.
Thank you but there are also 5 more arduino codes.Dont we use them?
Open the file Pneumo_Arduino.pde with the Arduino IDE and upload the code to the Arduino. If you don’t know how to upload a sketch to an Arduino, I think it is better if you study a manual about Arduino. The are tons of manuals about this.
I downloaded the “The Delta robot in pick and place configuration.” codes.But I dont know how to use them.
Hi,I am new on Arduino and i get the codes which you posted.
There are four pde files.I built the case of the arduino .Now i dont know which pde file should i install to the arduino.Could you please help me?
Sorry, there are 3 different zip files, each for a different application. About which zip file are you speaking?
ok ho scoperto che anche lei è italiano,le chiedo davvero scusa er il disturbo..sto facendo il suo robottino che viene comandato dal mouse per la tesina di maturità e ho un po’ di problemi..ho caricato il suo programma su arduino,parte il processing ma non parte il robottino,ho provato a caricare alri codici ma con quelli i servomotori partono..se ha una mail o skype le chiedo il favore di mandarmelo..le chiedo davvero scusa per il disturbo e spero che riesca ad aiutarmi
with this code we use arduino and processing?
see the line:” The Delta robot drawing. This is a first draft. The code is available here.”
click on “here”
where?? can you send me this code please? i don’t find it
The code is linked in the post
hi,
where is the code for the robot in this video? http://www.youtube.com/watch?v=Q4DUnNWMPmc
Hello! I am also building a delta robot. I want to know what is the ratio of arm and forearm in delta robot????
I need urgent help….plz reply me soon, thanks!
12 cm upper arm, 25 cm lower arm
In this part of the code:
void setup() {
size(600,600);
// open serial port
myPort = new Serial(this, Serial.list()[0], 19200);
frameRate(100);
noCursor();
}
in the instruction:
myPort = new Serial(this, Serial.list()[0], 19200);
the program take the first serial port. You can see witch is your port in this mode:
println(Serial.list());
myPort = new Serial(this, Serial.list()[0], 19200);
The first port you see after the println(Serial.list()); is the Serial.list()[0], the second is Serial.list()[1] and so on.
So, you can find your right port.
First of all thank you for helping me.
No I don’t see the data in the Serial Monitor.
When I try to change the Serial port a get an error “ArrayIndexOfBoundsException: 2” and
Stable Library
=========================================
Native lib Version = RXTX-2.2pre2
Java lib Version = RXTX-2.1-7
WARNING: RXTX Version mismatch
Jar version = RXTX-2.1-7
native lib Version = RXTX-2.2pre2
Exception in thread “Animation Thread” java.lang.ArrayIndexOutOfBoundsException: 2
at DeltaArduProc___Proc.setup(DeltaArduProc___Proc.java:36)
at processing.core.PApplet.handleDraw(Unknown Source)
at processing.core.PApplet.run(Unknown Source)
at java.lang.Thread.run(Thread.java:662)
Hi, I am having trouble with getting the Processing to send the data to the board. The Processing gets the mouse movements and coverts to data but the data doesn`t get to the Arduino. Could you help me ?
PS: My english isn`t very good.
Do you see any data coming from Processing to Arduino in the Serial Monitor?
Is the serial port in Processing the right serial port? es. 0 or 1 etc?
Can you explain more in deep the problem?
Hi Davide.
I had a that problem when working with arduino and servos. I came to a conclusion, that happen when Arduino can’t give current to all devices. The solution is to feed all devices through external voltage sources, that did the trick to me.
I think this is an electrical problem.
Test only the Arduino/ATtiny85, without servos connected.
Connect one servo and test, then connect the second etc.
The servos have to be a separate power (5-6) and ALL the grounds have to be connected.
Can you explain how the servos power is made? batteries? which kind?
Hi,
congratulations for this excellent tutorial.
Hi have tried to replicate it, but my arduino reset every time after 15-20 seconds.
I have a separate 5v supply for the servo, with common mass, but arduino is still resetting…
the code is linked inside the post: http://robottini.altervista.org/wp-content/uploads/2011/10/DeltaArduProc.zip
There is the Arduino and Processing code.
hello there.. The Delta robot drove by a mouse with Processing look cool… can i know what software you use to interface with the mouse ?