Processing and Opencv 2.3.1 – How to install in win 7

THIS HOW-TO WORKS ONLY WITH PROCESSING 1.5.1, NOT WITH THE LAST 2.03b


The procedures to install opencv 2.3.1 libraries and JavaCvPro are explained in several sites. But I had many difficulties doing an installation in Windows 7, even following the step-by-step guides.

Then I would write a step-by-step procedure that is as simple as possible. The information sources that I used are :

http://code.google.com/p/javacv/wiki/Windows7AndOpenCV

http://www.mon-club-elec.fr/pmwiki_reference_lib_javacvPro/pmwiki.php


This installation is working in windows 7 (32 and 64 bit) with Processing 1.5.  It was tested by me in 4 different pc. These are the steps:


1. Install the runtime components for Microsoft Visual C++ 2010:


2. Extract OpenCV-2.3.1-win-superpack.exe inside the root directory C:\. At the end, the opencv are in  C:\OpenCV\


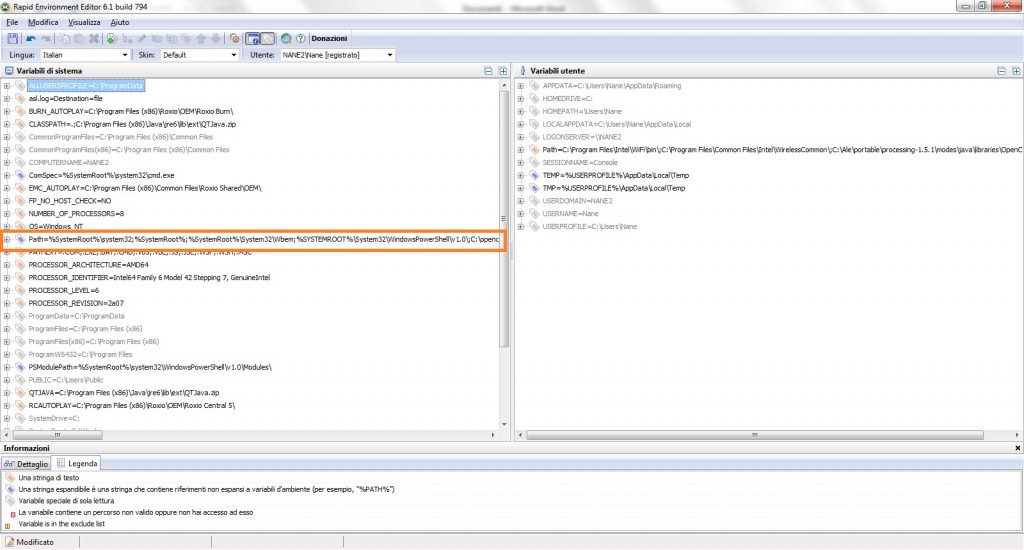
3. Add the ddl path generated by opencv to windows 7 path. This can be made easily with a free program:  RapidEE. Download it from here and launch it.


4. Find the registry key PATH and click on it.


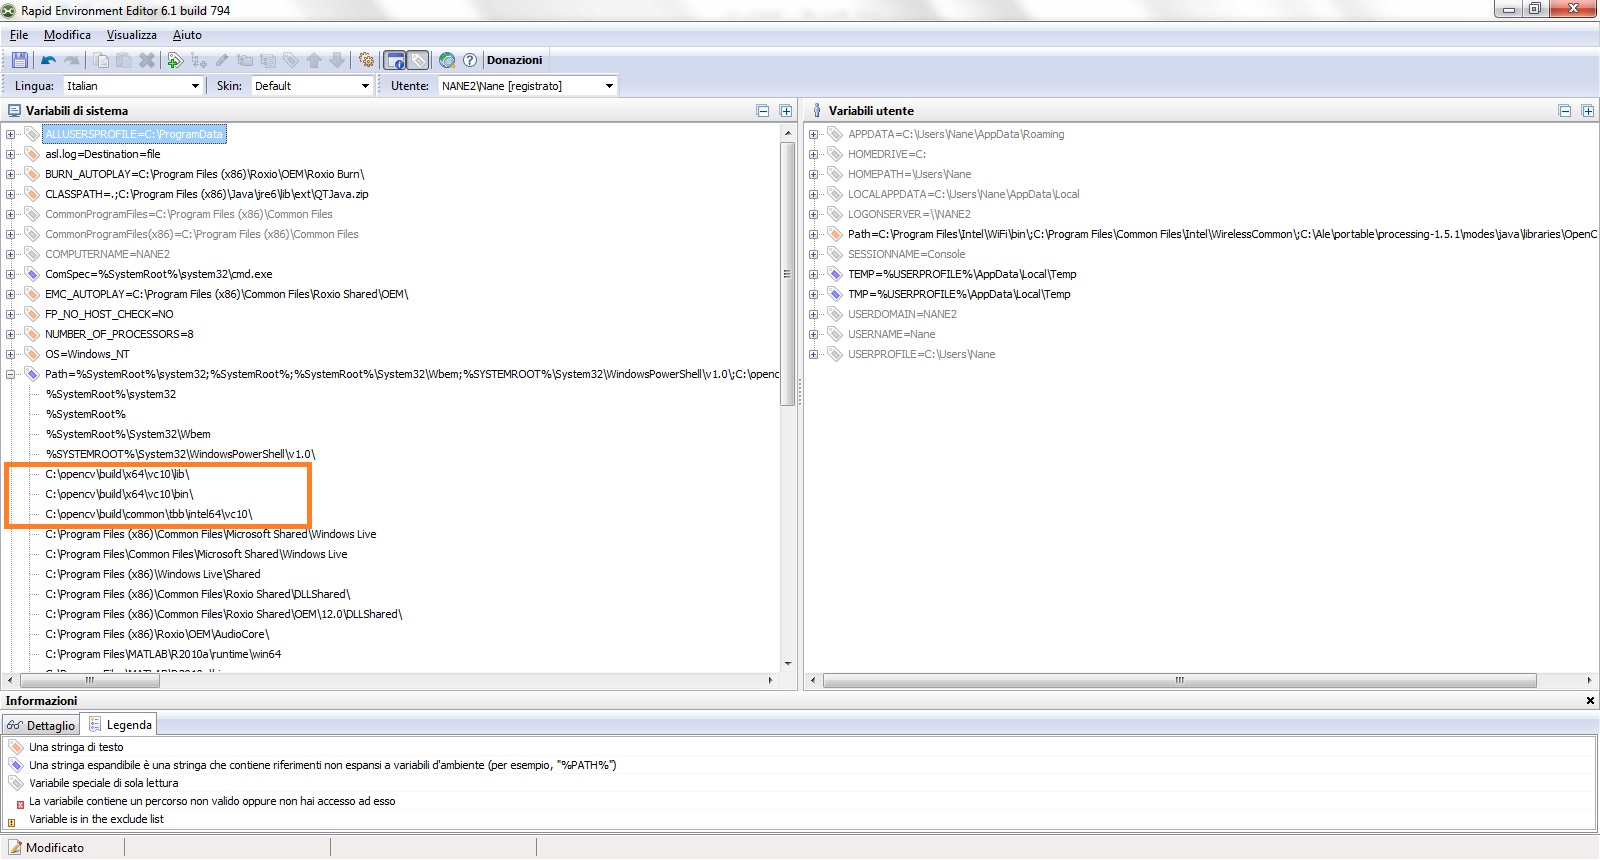
5. Click the right mouse button and choose add value in the menu. Add these values:

  • C:\opencv\build\x64\vc10\bin\
  • C:\opencv\build\x64\vc10\lib\
  • C:\opencv\build\common\tbb\intel64\vc10\

If the win7 32bit version the directory are with x86 instead of x64. For 32bit version add also C:\opencv\build\common\tbb\ia32\vc10\


6. Download the JavaCvPro library (version 0.3) here.


7. Extract and copy all in the Processing library directory: Processing /Mode/java/libraries


8. Download the last version of binary JavaCV  library here (today is  javacv-bin-20120329.zip).


9. Extract and copy all in the Processing library directory: Processing /Mode/java/libraries


10. Create a directory called library inside the javacv-bin directory and put all the file (not the sample directory) inside this new library directory


11. Rename the library javacv-bin extracted with this name: javacv


12. Download the last version of the binary Javacpp library here  ( today is javacpp-0.1-bin.zip)


13. Extract and copy all in the Processing library directory: Processing /Mode/java/libraries


10. Create a directory called library inside the javacpp-bin directory and put all the file (not the sample directory) inside this new library directory


11. Rename the library javacpp-bin with this name: javacpp


If all the steps are succeeded, it is done. Now you can start Processing and test this simple program (take from here):

import com.googlecode.javacv.*;
import com.googlecode.javacv.cpp.*;

import monclubelec.javacvPro.*;

OpenCV opencv; // déclare un objet OpenCV principal

void setup(){ // fonction d'initialisation exécutée 1 fois au démarrage

        opencv = new OpenCV(this); // initialise objet OpenCV à partir du parent This
        opencv.allocate(320,240); // crée le buffer image de la taille voulue

}

void  draw() { // fonction exécutée en boucle

}


It is very important to include also the javacv and javacpp libraries. In the http://www.mon-club-elec.fr documentation this is not required, but in my experience, without these libraries, the program doesn’t work.


Tags: , , ,

Processing and Opencv 2.3.1 – Introduction

To build a robot that draws portraits I need to have a good supply of tools for image processing. The best open source libraries available are the opencv that I would use with Processing.

Unfortunately opencv are available in C + + and python, but not in Java that is the language used in Processing. Luckily some guys  have built some wrappers that allow to use opencv with Processing.


Opencv processing library

The most famous library is this: http://ubaa.net/shared/processing/opencv/ which is very well documented. Its installation is simple and works well. But this library  supports only a few commands opencv and doesn’t provide access to thousands of opencv functions.It use QuickTime to perform functions that use the webcam. The commands supported are the most important, however, it is not enough.It allows to write code using opencv in a very simple way, making the primitives opencv a part of Processing language.

For example this is the capture()  function that allocates and initializes resources for reading a video stream from a camera.
import hypermedia.video.*;
OpenCV opencv; //opecv object

void setup() {
size( 320, 240 ); //window size
opencv = new OpenCV( this ); // opencv object
opencv.capture( width, height ); // open video stream
}

void draw() {
opencv.read(); // grab frame from camera
image( opencv.image(), 0, 0 ); } // and display image

not bad! only 10 rows to display the webcam image. The opencv functions are very easy with this library, but the opencv supported is only the 1.0 and the number of the function is very low.


JavaCVPro

Luckily there is another library that allows to use the last version of the opencv, the 2.3.1: JavacvPro.
The documentation for this library is only in French.I understandFrench well, so I have no problems! 🙂

This library implements natively over 100 opencv functions, making them part of the language Processing. In addition it use the library GSVideo which is the official video library for the version 2.0 of Processing.

The use of the library is very simple. This is an example of syntax of the function of edge detection of the original opencv:

cvCanny (opencv_core.CvArr image, opencv_core.CvArr edges, double threshold1, double threshold2, int aperture_size)

this is the corresponding on JacaCvPro in Processing:

canny (PImage image)

The library takes care of the rest! not bad right?  But how does work the processing wrapping in opencv? Opencv is a library written in C + +, Processing works in Java.
JavaCvPro uses another library , javacv, which implements almost all the OpenCV functions directly in Java. Moreover, there is another library, javacpp, which implemets the real link between Java and C++.

So, the chain among libraries is:

Processing —> JavaCvPro —> javacv —> javacpp- –> OpenCV

Difficult? No, easy!

In the next post I show how install opencv and JavaCvPro in windows 7 environment.

Tags: , ,

Dynamixel AX-12A and Arduino: how to use the Serial Port

I bought two servos Dynamixel, the AX-12A, which are the basic servos version of the Korean company Robotis inc.
Dynamixel servomotors are like Ferrari in the world of the  cars : the best servomotors on the market.
Some characteristics of these servos:

  •   Operational Torque: 144 oz-in (10.4 kg.cm)
  •   1 / 2 duplex multi-drop serial bus
  •   1M bps serial communication
  •   Reports position, speed, load, voltage, and temperature
  •   Full rotation mode
  •   300 ° angular position in 1024 increments
  •   Speed ​​and torque control in 1024 increments
  •   Built in LED status indicator / alarm
  •   Shutdown on max / min voltage, load or temperature
  •   Single cable network connection

They are not particularly expensive: about $ 45 U.S., in Europe about 45-50 euros.

These servomotors have difficulty connecting to the Arduino. In fact, the half-duplex communication to 1Mbps requires additional circuitry to make connections to Arduino if there are several servos to be connected. A single servo can be connected directly to the Arduino, in the case of several actuators it is necessary to use a tri-state buffer, which is placed between the Arduino and AX-12A. A simple tri-state buffer is the 74LS241N.

74LS241

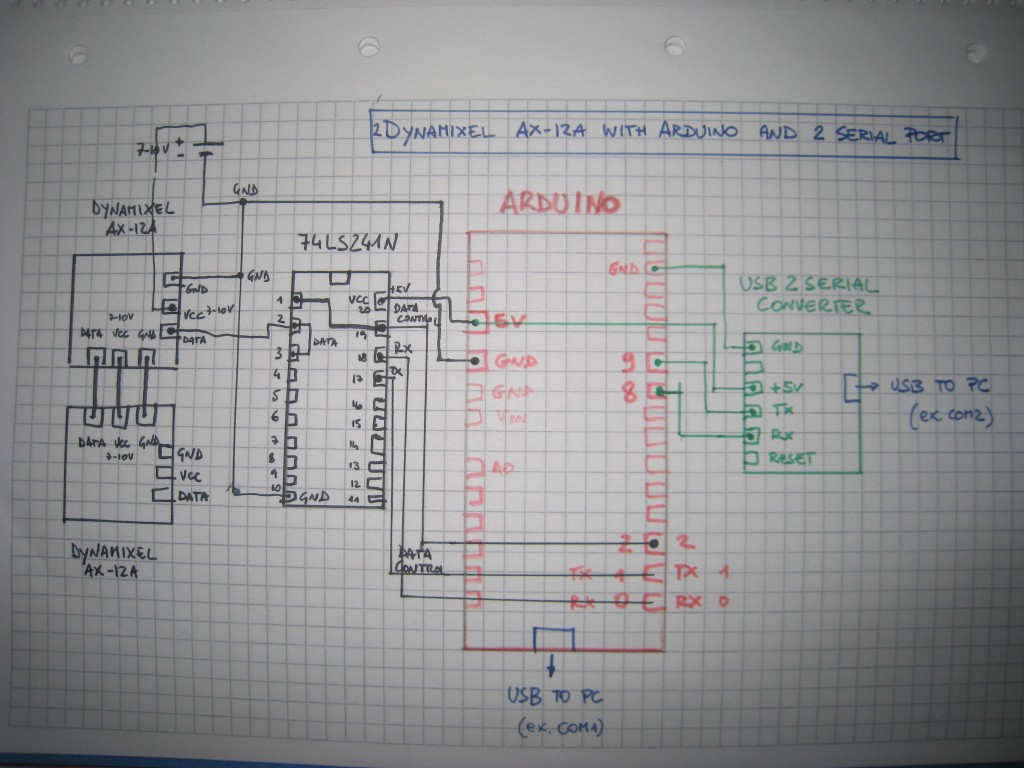
The Dynamixel protocol is a serial protocol, so, Arduino side, the buffer 74LS241 must be connected to the serial port and then on pins 0 and 1. This is a problem: if the serial port is used byDynamixel, how to display information through the Arduino IDE Serial monitor?

We need another serial port. The Arduino library NewSoftSerial  can help us, but we also need a USB-serial converter. I chose the converter USB2Serial built from Arduino team.

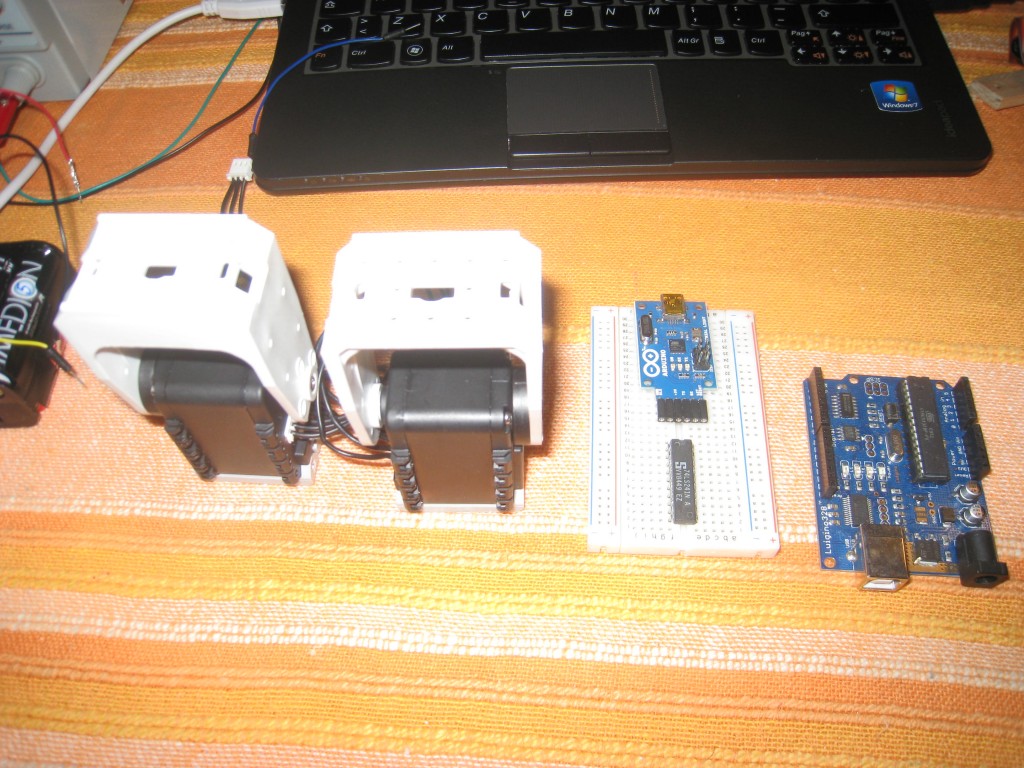
This is a picture of all the components needed to use the Dynamixel Servos.

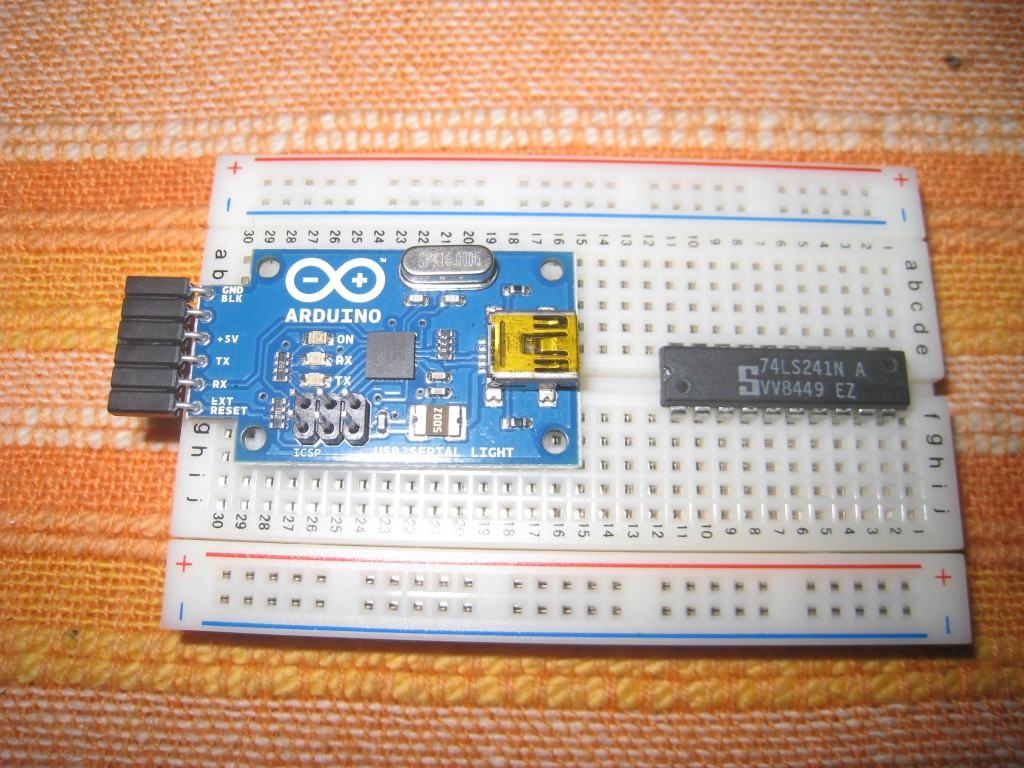
The 2 ‘strange’ components: the 74LS241 and the USB2Serial converter:

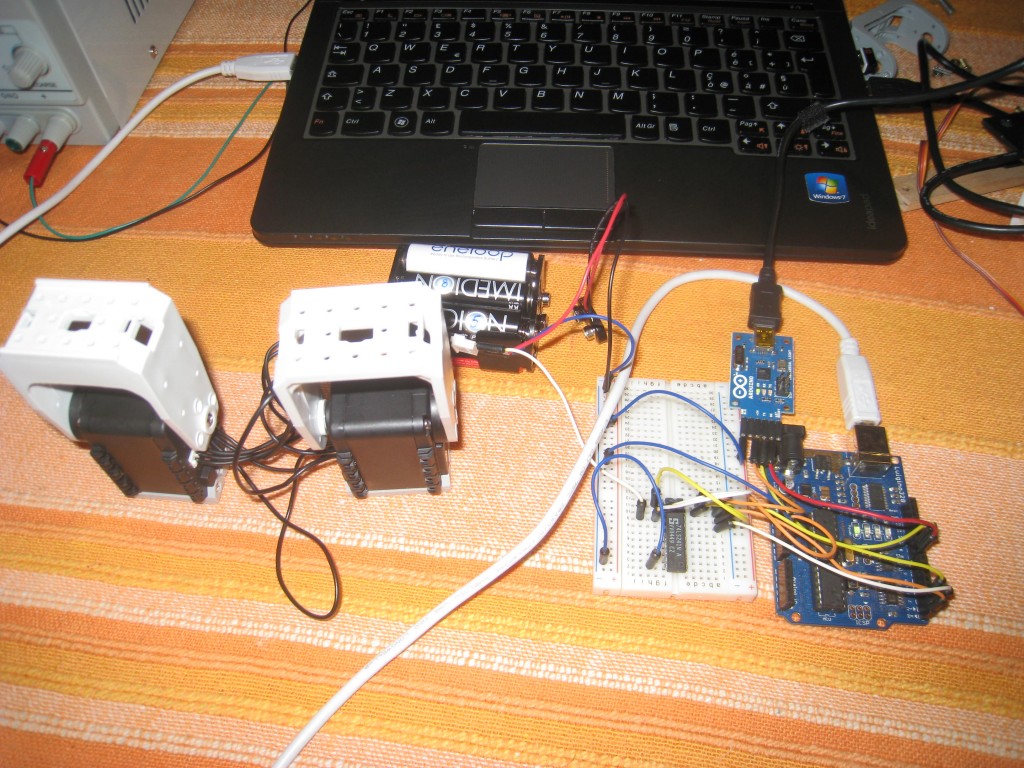
These are all the components wired:

This is the wiring schema (sorry for the manual drawing):

Dynamixel servos require a software library to work with Arduino. An awesome library, realized by Savage Electronics, can be found here. Instructions can be found here.

This is a short video showing the Dynamixel servos in action. It is possible also to see the values printed in the Serial monitor with the NewSoftSerial throw the Serial port between the pins 8 and 9.

This is the code used:

#include <Dynamixel_Serial.h>
#include <NewSoftSerial.h>

NewSoftSerial mySerial(9,8); //9=tx, 8=rx
int k=0;

void setup(){ // Configuration

Ax12.begin(1000000,2); //2=data control
mySerial.begin(9600);  //speed of serial port used by NewSoftSerial
}

void loop(){

// move servo 1 and 2 randomly
Ax12.move(1,random(200,600));
Ax12.move(2,random(200,600));
mySerial.print("Number:");
mySerial.println(k++);

delay(1000);

mySerial.print("Number2:");
mySerial.println(random(100));

}