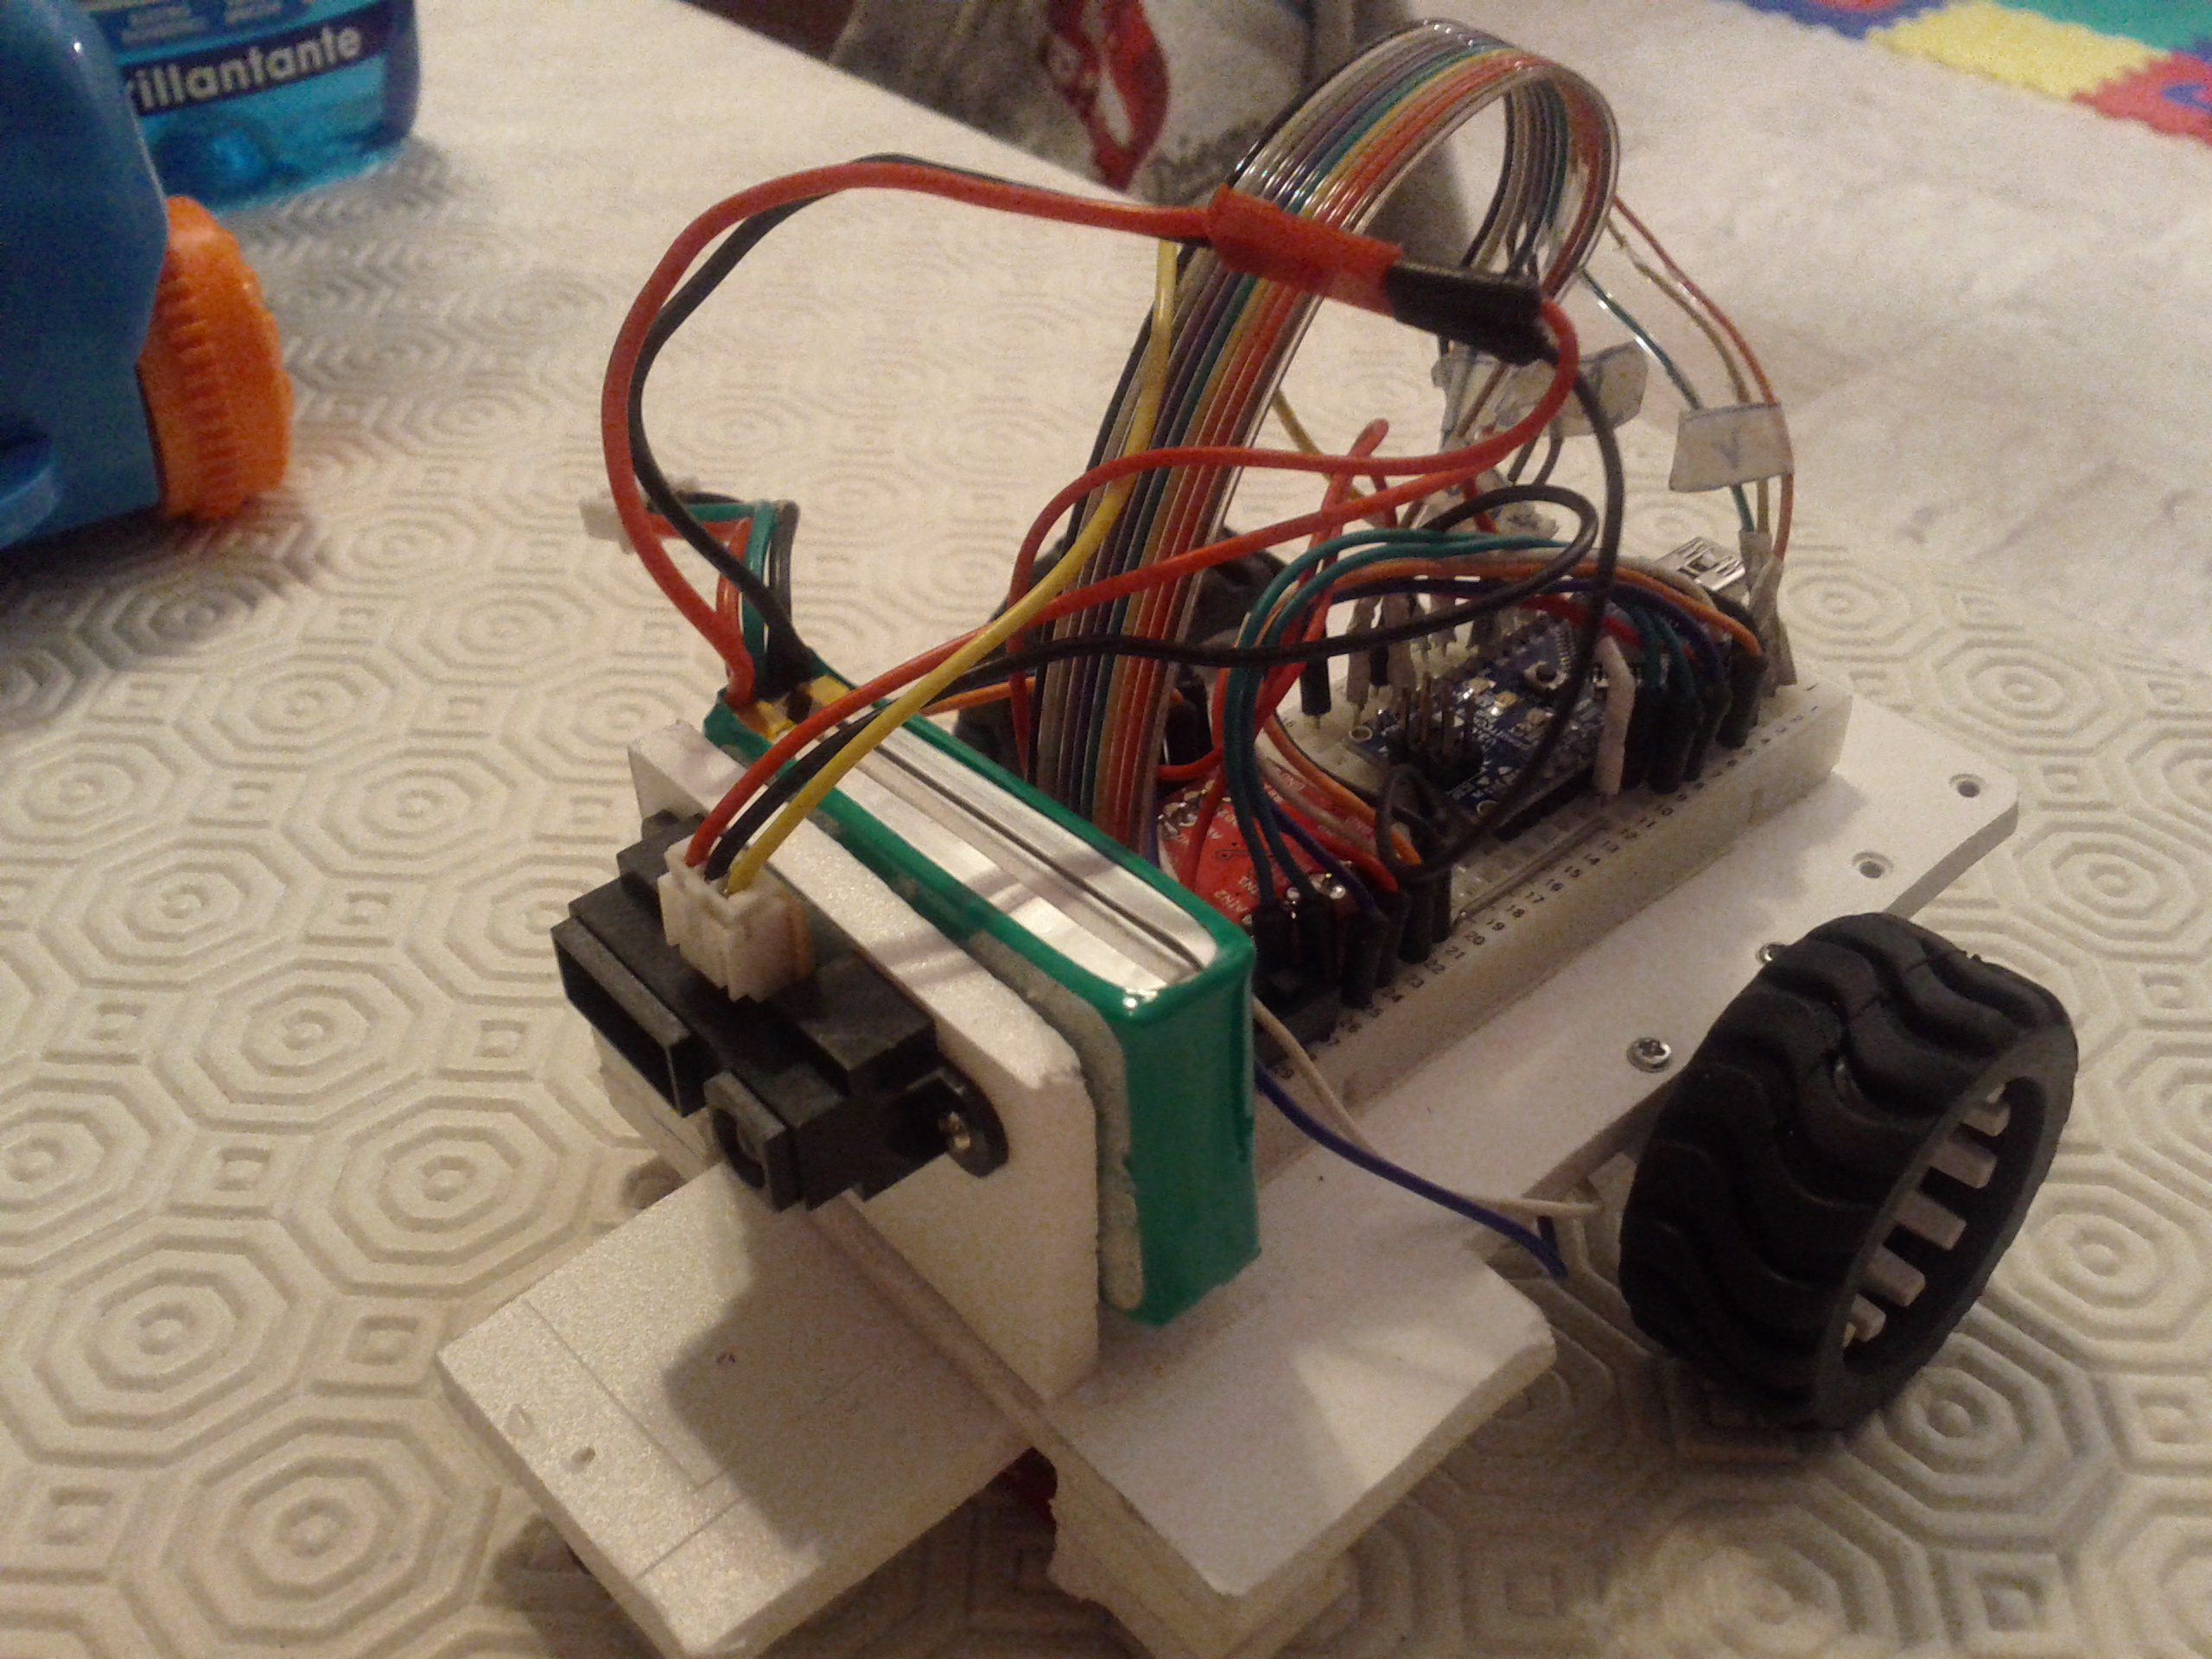
Although it is one of the classics of robotics for beginners, the line follower robot, made at high level, is quite complex. On Youtube you can see line follower running at 3 m / s and more, with optimization and maximum performance research that achieves discrete levels.
Usually a line follower competition is based on pure speed and the path is quite linear and simple, with large curves and wide straights. In this case the hardware part is the most important, because the sw part is quite simple to build. it is important to find the right compromise between the mechanical parts and the engine, to make it running as fast as possible. Unfortunately requires a lot of money, because the engine performance search or the wheels with special tires can be very expensive.The alternative is based on paths that are rather difficult or very twisted, with right angles, intersecting lines, lines breaks, obstacles and so on. In this case the HW is much less important. More important is the algorithm and then the sw. The ability of the robot builder is to build a powerful algorithm that allows the robot to drive fast in every situation.
In this tutorial I would describe the robot that I have realized, that is able to face a tortuous path made of curves at 180 ° rather than tight coils, trying to have a good speed.
The robot ,according to tradition, was home built. It is also already equipped with an infrared sensor front in case you wish to use it in a path with obstacles.
Questo è Microbo(t) – line follower robot:
It ‘s built with the following elements:
– Chassis 5 mm PVC foam (few cents)
– Arduino Nano (about 40 euros)
– Drive Pololu 50:1 HP (about 30 euros both)
– Pololu motor bracket (both about 6 euros)
– Caster wheel Pololu 3.8 “plastic (about 3 euros)
– Pololu Wheels 42×19 (both about 10 euros)
– Motor driver SparkFun TB6612FNG (about 9 euros)
– Sharp IR Distance sensor 4-30 cm (about 15 euros)
– Sensor line Pololu QT-8RC (about 12 euros)
– 7.4V 900mAh Battery Li-Po (about 9 euros)
– some screws and wires
As you can see the components expensive are Arduino Nano and the motors. Nothing forbids to use a traditional Arduino with an obvious saving of money. In my configuration it weighs about 160 grams. You can do much better, in fact on the internet there are line follower with Arduino that weigh 100 grams.
Some comments on hw components used. The driving system, formed by Pololu wheels and motors is almost good. I think that even better is using HP 100:1 Pololu motors which provide even more traction and fluidity in the changes of direction, even if it has a lower number of revolutions/minute. I tested also the 30:1 motors, but they were too nervous. Absolutely bad is the plastic wheel caster form Pololu. Unfortunately I had no other small than this, so I kept it. Not recommend its use. Terrible.
The motor driver SparkFun TB6612FNG is a little undersized. In fact it provides 1.2A at full speed, when the Pololu HP motors may require up to 1.6A. But I had no problem with these drivers and they still work, so I can only advise them. Unfortunately they have a lot of wires, 7 for driving, 2 for the Vcc voltage (+5 V), one (or two with the ground) for the motor voltage and 4 wires for motors. In total 14 wires that are several. They are simple to program and manage. The full brake function is not good. In fact, if you need to brake, however, takes a little bit to stop, victim of inertia. I think that the engines 100:1 can help on this.
The line sensor Pololu QT-8RC is good. It provides out-of-the-box a digital output and can be connected directly to the Arduino digital ports. After a stage of self-learning during the first few seconds (see the video), it is able to calibrate with the best values taking into account the reflectivity of the surface and the ambient light conditions. It can follow the black lines on white background or white on black background. For this sensor there is an Arduino library written by Pololu that provides a value between 0 and 8000 depending on the sensor (from left to right) which is above the black line. I modified the library to get a response that goes from -800 to +800 with zero when the line is well below the IR sensor in the middle. This from my point of view makes easier the control. The only real problem I had was in the presence of right angles. In this case the robot has not always stopped in time and managed to turn. Unfortunately I have no videos on this particular problem.
Once built the robot, the biggest difficulty is the control parameters determination, that allow the robot to come back to the line when goes away. In this case I have put in place the usual PID control, although in my version was reduced only in PD, proportional and derivative. The integral control, with the frequent changes of direction, is extremely difficult to detect.
I also wrote some simple routines for the detection of right angles. In this case the robot tries to stop and turns 90°. This technique has worked quite, but you can sure do better.
For the IR front sensor I didn’t have any important test for obstacle avoidance. The main problem is due to the need to rotate the robot for the obstacle avoidance operating in open-chain, ie, without feedback. The robot should pass the obstacle, but that succeeded a few times because the motors battery voltage varies over time, with a variation of path. I did not do further tests, but there are two possibilities:
- a dc-dc converter boost 4-25v for example like in the Pololu 3pi robot that maintains a constant input voltage to the motors and that have a good precision even in the absence of encoder
- the encoders in the wheels with angles measurement
The dc-dc converter costs less than 10 euros, while the cost for the Pololu encoder is about 25 euros. Maybe in the next version of the Microbo(t) I will decide which solution to adopt. Clearly the solution encoder is more sophisticated but requires more programming effort (and verify that there are still pins available on the Arduino!).
This is the code for Arduino, commented but not very clean. Link
This is the Microbo(t) in action: