THIS HOW-TO WORKS ONLY WITH PROCESSING 1.5.1, NOT WITH THE LAST 2.03b
The procedures to install opencv 2.3.1 libraries and JavaCvPro are explained in several sites. But I had many difficulties doing an installation in Windows 7, even following the step-by-step guides.
Then I would write a step-by-step procedure that is as simple as possible. The information sources that I used are :
http://code.google.com/p/javacv/wiki/Windows7AndOpenCV
http://www.mon-club-elec.fr/pmwiki_reference_lib_javacvPro/pmwiki.php
This installation is working in windows 7 (32 and 64 bit) with Processing 1.5. It was tested by me in 4 different pc. These are the steps:
1. Install the runtime components for Microsoft Visual C++ 2010:
2. Extract OpenCV-2.3.1-win-superpack.exe inside the root directory C:\. At the end, the opencv are in C:\OpenCV\
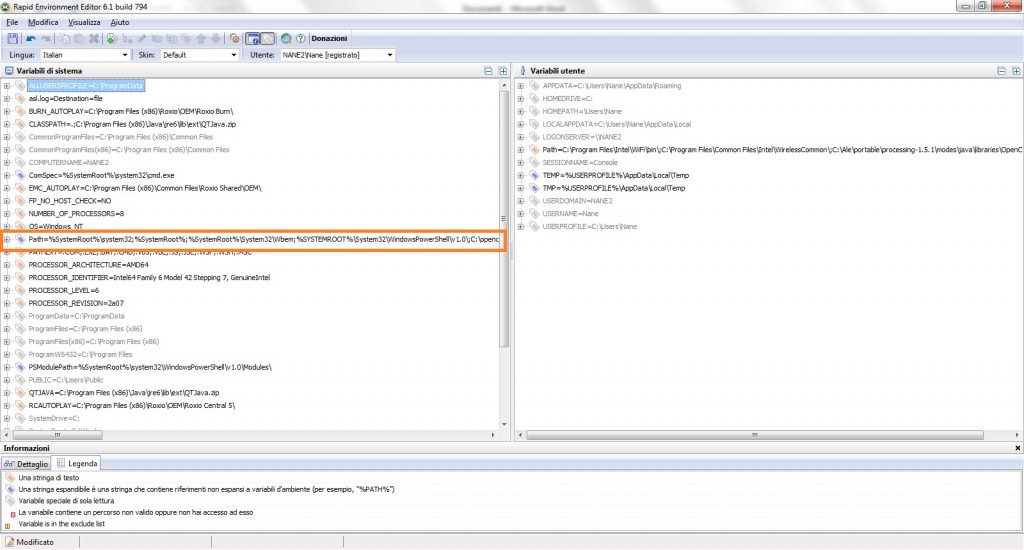
3. Add the ddl path generated by opencv to windows 7 path. This can be made easily with a free program: RapidEE. Download it from here and launch it.
4. Find the registry key PATH and click on it.
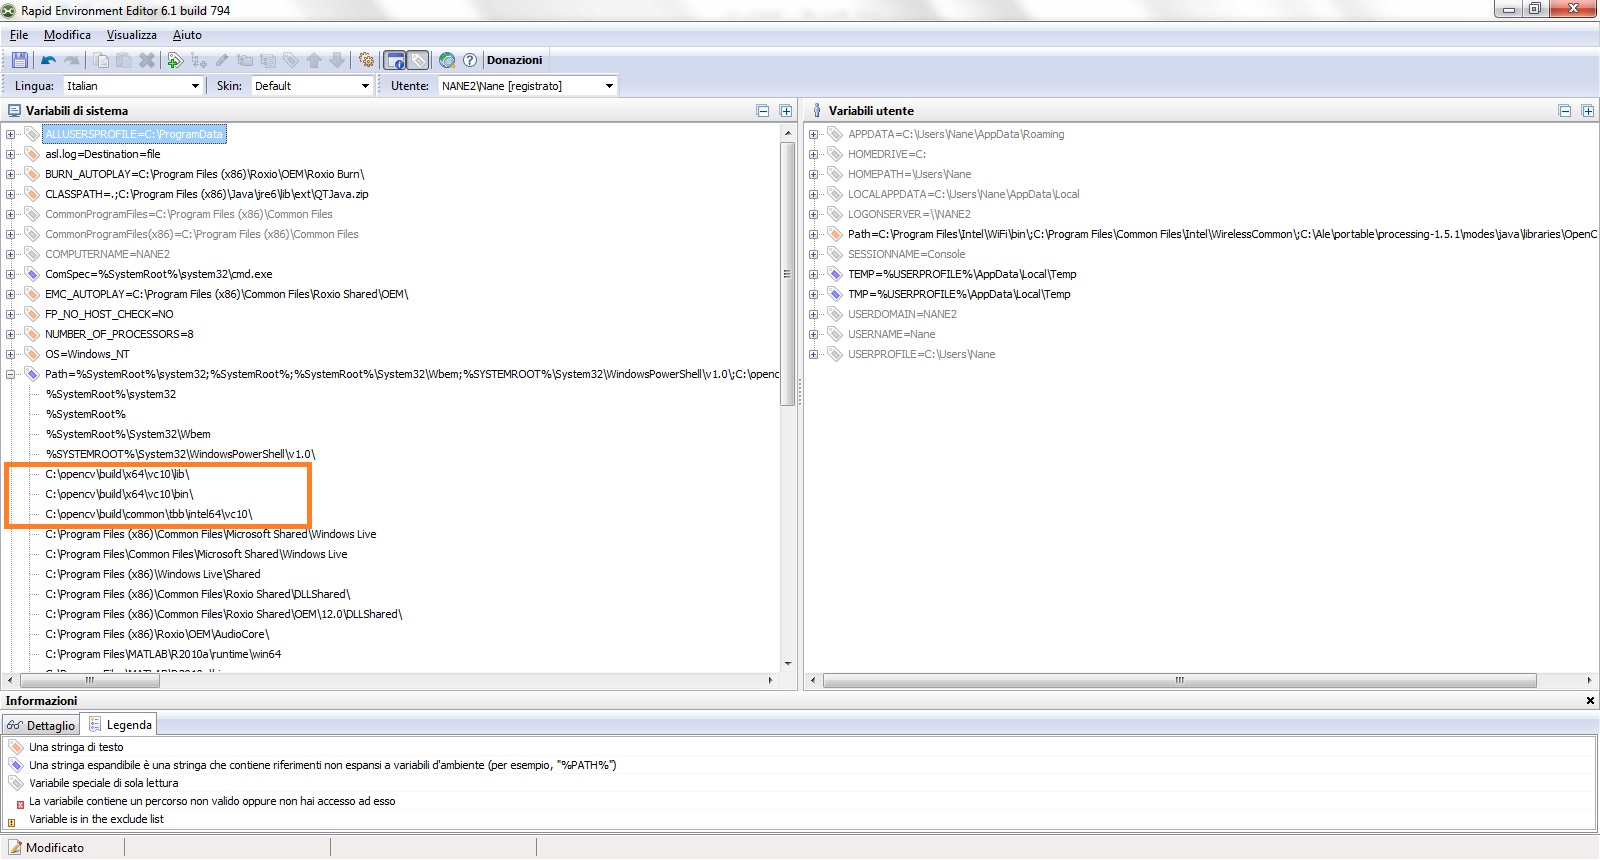
5. Click the right mouse button and choose add value in the menu. Add these values:
- C:\opencv\build\x64\vc10\bin\
- C:\opencv\build\x64\vc10\lib\
- C:\opencv\build\common\tbb\intel64\vc10\
If the win7 32bit version the directory are with x86 instead of x64. For 32bit version add also C:\opencv\build\common\tbb\ia32\vc10\
6. Download the JavaCvPro library (version 0.3) here.
7. Extract and copy all in the Processing library directory: Processing /Mode/java/libraries
8. Download the last version of binary JavaCV library here (today is javacv-bin-20120329.zip).
9. Extract and copy all in the Processing library directory: Processing /Mode/java/libraries
10. Create a directory called library inside the javacv-bin directory and put all the file (not the sample directory) inside this new library directory
11. Rename the library javacv-bin extracted with this name: javacv
12. Download the last version of the binary Javacpp library here ( today is javacpp-0.1-bin.zip)
13. Extract and copy all in the Processing library directory: Processing /Mode/java/libraries
10. Create a directory called library inside the javacpp-bin directory and put all the file (not the sample directory) inside this new library directory
11. Rename the library javacpp-bin with this name: javacpp
If all the steps are succeeded, it is done. Now you can start Processing and test this simple program (take from here):
import com.googlecode.javacv.*;
import com.googlecode.javacv.cpp.*;

import monclubelec.javacvPro.*;

OpenCV opencv; // déclare un objet OpenCV principal

void setup(){ // fonction d'initialisation exécutée 1 fois au démarrage

        opencv = new OpenCV(this); // initialise objet OpenCV à partir du parent This
        opencv.allocate(320,240); // crée le buffer image de la taille voulue

}

void  draw() { // fonction exécutée en boucle

}
It is very important to include also the javacv and javacpp libraries. In the http://www.mon-club-elec.fr documentation this is not required, but in my experience, without these libraries, the program doesn’t work.


